Friday, July 26, 2013

Vespa PX 125 Gearbox oil change

Pretty simple task, but worth doing, since Fiametta (that's my Vespa's name) is new to me, and I don't know when or if the oil was last changed.

Engine cowl off


Loosen drain bolt


Let oil run into some sort of pan. I did this task with the engine hot, to get as much of the old dirty oil out as possible.


Reinsert the drain plug. The filler plug is this shiny flat head screw.


With filler plug removed.

 
 I bought SIP SAE 30 Gearbox Oil from the Vespa Cafe Krakow.


 Yeah, unfortunately it's not going to be as easy as this video.


The filler tube is larger than the filler hole, so I'm going to have to jam a tiny funnel in there


And squeeze the bottle to push the new oil into the gearbox


Tighten up the filler plug and that's it.


Monday, July 22, 2013

Restoring plastic

I've tried a few different products for restoring the plastic and rubber parts. The cockpit sprays and cleaners work great on the rubber parts, but nothing seems to clean and restore the black molded plastic.


This is after trying a few different products. I did some searching and found an interesting video on Youtube about using peanut butter. No joke. So I took this part off


Got a rag and some creamy peanut butter


And wouldn't you know it, it works like a charm


So obviously this isn't going to repair any scratches or wear, but at least it restores the color of the plastic.


For a couple $$ it's a pretty nice result

Mirrors

One of the first orders of business for this Vespa was to get some rear-view mirrors. I didn't have time to post, so now I'm catching up.

This is what I got from Vespa Cafe Krakow:

BUMM 928/44 from S.I.P.

Link to official Busch & Müller part here


This is what they look like with the left and right installed.


But beware, the mounting hardware included with the brake side mirror won't work on a Vespa with a front disk brake. I used the accessory mount that was already on the bike. Evidently someone broke of the factory mirrors, got accessory mirrors and broke them off too before I got this scooter.

New hardware

I've had enough of stuck phillips head screws on previous projects, so one of the first things I'll be doing is replacing all the hardware I can.

I lent my camera to someone for a few days, so these are taken with my phone. Now I know it's not really worth taking pictures for a blog with my phone.

The master cylinder cap screws are mega rusted and super stuck.


And well these are just ugly.


 So here a a bunch of new allen head screws that will replace the old, rusty, stuck phillips head screws.


Ah, that's much better


Little before and after


Cost is basically negligable. Like 10 pln. Benefit comes when I have to do a repair and I'll be able to take things apart in a reasonable amount of time.

Thursday, July 4, 2013

Rear drum brake cleaning

So my friend Piotr from the Vespa Cafe also has a PX 125. He has been having some issues with his and wanted to swap out some parts with mine to try to identify the problem.


This was a great opportunity for me to look at a couple of things on my bike and clean it up a bit.

Everything is so dirty. First order of business for me is to have a look at the rear brakes, they are very sticky and driving me kinda nuts. I'm sort of expecting to find worn out or contaminated brake shoes.


Taking the rear wheel off is easy, makes sense. I was shocked at how loose the wheel nuts were. Once the wheel is off, straighten out the cotter pin, being careful not to break it as it's going to be reused. Once it's straightened, pull it out with a pair of pliers


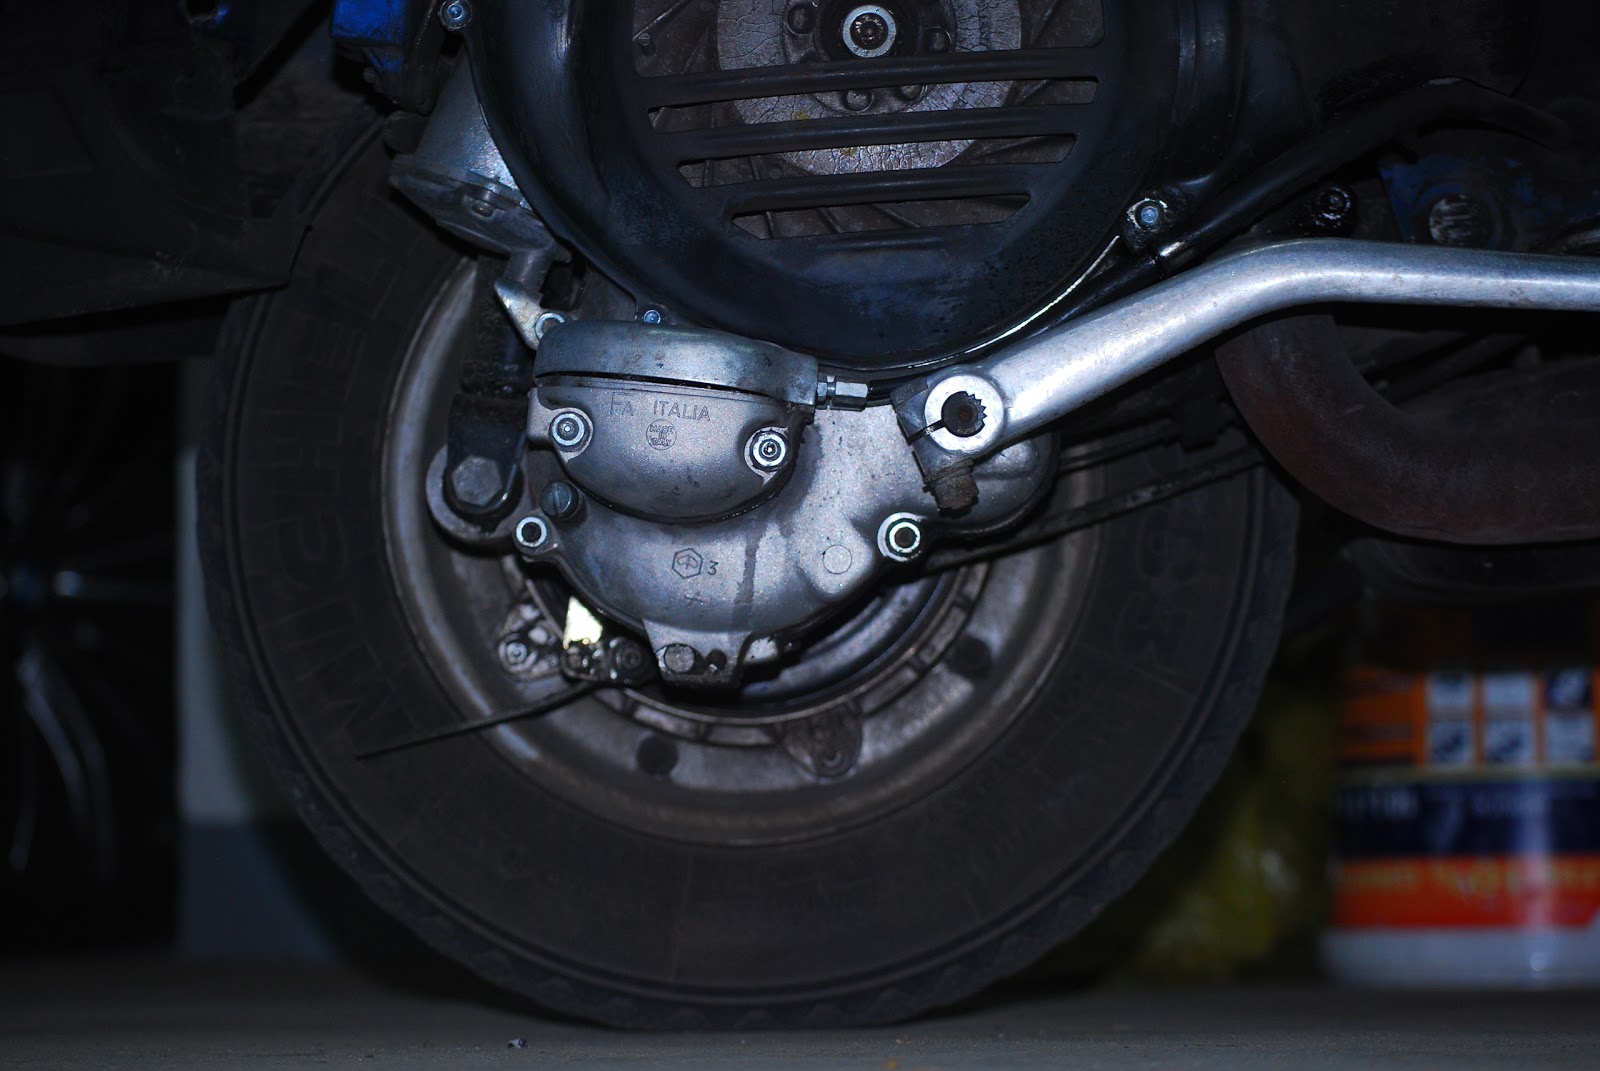
Underneath that cover is a big nut. Forgot to take a picture. That nut was crazy torqued. If you are doing this by yourself, put the scooter in gear, find a way to press on the rear brake pedal, stabilize the scooter and use a breaker bar with a huge pipe extension to get this nut loose.

Once the nut and washer are off, the brake drum slides right off no problem. I was again surprised to find that other than a little brake dust, everything looked great. I just sprayed a little brake cleaner in here and that's it.


Brake shoes look fine, lots of life left


Brake drum looks ok too, just cleaned it up a little bit. No major scratches or anything.


So just clean it up and put it back together


Nice to see that there actually is a wheel under all that dirt, grime and oil


I word of caution on reassembly! These bolts shown with the red arrows where the wheels attached to the brake drum are extremely delicate! I snapped one straight off using a torque wrench set to 25 Nm. I'm now driving on 4 bolts. I think I may have to drill this bolt out and use a loose nut and bolt to fix the wheel properly.


Once reassembled, I drove home. The brakes work fine now, nice and smooth. It's actually a huge difference. In fact, it seems like too much of a difference from just cleaning the brakes. I suppose...you can lift the front or the rear of the scooter with your hands, maybe it's just small and light enough that a little bit of brake dust and water is enough to make the drums lock up?

Fuel consumption under regular usage conditions

Second tank of fuel, and this time the fuel came out better. Normal city riding, much of the time 2-up.

186.7km 5.511L = 2.95L/100km or 79.69 mpg

That is crazy. I'm delighted!

Monday, July 1, 2013

First fuel consumption check

I have my first chance to measure fuel consumption today (from full fill up to full fill up with mileage recorded)

I last tanked up at 28705.1 km. This time I've got 28858.5km. So I drove 153.4 km. Filled up 5.41 L of Statoil Eurosuper 95. So I got 3.53L/100km, or 66.63 miles per gallon. Not bad at all, but I'm sure this thing can do better. There was lots of two-up riding and (cough cough) testing the machine's capabilities.


Hanging out at the Vespa Cafe this weekend, we swapped the battery out for a new one. This confirmed that my electrical problems are with a weak battery and not the starter. Which for me is good news, since the battery can be easily replaced, and there is no rush, since I can just keep kick starting it until I've got the cash.